How To Make Apple Purée For Your Baby At Home Without A Blender
When you are a mom and struggling to get your kid(s)to eat well but you have to deal with not having certain instruments like a blender, then you may have to find other ways to obtain the same results.
We (my daughter and I) are spending time at my mom's house and since there were apples a home, I decided to make some apple purée for my girl. Though there was a blender at home, I couldn't use it for two reasons;
- it was a household blender and various spicy ingredients have been blended in it already. I was scared it will affect the taste and composition of my baby's food.
- the purée was small and I couldn't use the blender anyway.
At that point, I had to find an alternative method to get the apple purée done for my girl to eat. Here is the complete recipe for the apple purée and how I ended up making it without a blender.
Make Apple Purée For Your Baby At Home Without A Blender

Ingredients
- Apple
- Clean water
Method
Wash and peel the apple.
Remove the hard middle and seeds.
Slice the peeled apple into small halves.
Put in the pot and add some water.
Boil until it gets very soft. It should be able to break at easily when touched with a spoon or fork.
Mash the apple pieces with a fork thoroughly then you can feed your baby.


There you go with your apple purée without a blender. The blended purée is smoother than the mashed one. You can further mash in small portions while feeding.
Currently I Am... Ep #1
Here is what I am currently up to.

Struggling to finish my school work
Guess who's got schoolwork dragging her behind? You guessed right, that's me. It's something I'm not proud of and yes, I'm struggling with finishing it because I have a Tortoise personality when it comes to working. If you don't understand what that means then read this post below. It will help you too.Are you a Tortoise or Hare? Here is how to tell.
What's important is that I'm determined to get it done and move on before the end of the year.
...especially while wearing diapers on my baby. She wears diapers from the brand Babylove which some time ago used the song Baby Love by The Supremes in their ad. I know just the start of the song and haven't listened to the whole song. But I sing the little one I know every time. This phase will pass too I know, lol.
I love the month of October and I plan to be consistent with my efforts towards achieving my goals.
Singing "Babylove, my baby love..." a lot lately
...especially while wearing diapers on my baby. She wears diapers from the brand Babylove which some time ago used the song Baby Love by The Supremes in their ad. I know just the start of the song and haven't listened to the whole song. But I sing the little one I know every time. This phase will pass too I know, lol.
Working on being consistent this October!
I love the month of October and I plan to be consistent with my efforts towards achieving my goals.
Feeling lighter and more active physically
I have a daughter whom I birthed by CS. I haven't been able to do any sport or physical activity of any kind because I wasn't yet time (for me). I don't know when doctors do recommend any form of workout for women after a CS but I decided to listen to my body and mind before I started working out. It's been two weeks since I started jogging for just a few minutes in the morning and I really feel better.
Yes, I have been skipping days (it's not been a perfect journey) but I feel the little I have been doing is fruitful. I feel lighter and movements are easier for me now. This motivates me to keep on jogging. If you want to know how I decided to start jogging then click the related post below to read.
Related: Why I Started Jogging Six Months After My C-Section
...if I should consider 9/5 or only working for myself. I won't say anything further about this one. If I do right now, it may feel like fighting a war. Just read more about it in the related post below.
Related: Working 9/5 or 24/7
Those are updates from my end. Overall I'm fine. October is slowly emerging to be my favourite month so I'm happy we are in October.
Related: Why I Started Jogging Six Months After My C-Section
Still wondering...
...if I should consider 9/5 or only working for myself. I won't say anything further about this one. If I do right now, it may feel like fighting a war. Just read more about it in the related post below.
Related: Working 9/5 or 24/7
Those are updates from my end. Overall I'm fine. October is slowly emerging to be my favourite month so I'm happy we are in October.
Why I Started Jogging Six Months After My C-Section
Recently I had some research to do for my school project which required me to walk a distance. The first day I went out, I returned with a lot of pain below my abdomen precisely around my C-Section scar. I couldn't take my legs up easily as well.
Why I Started Jogging Six Months After My C-Section

I complained about this pain to my grandma when I got home and she told me that it was because I don't go for walks. And she was right. I hadn't been physically active for the past six months. I did only a few walks at the hospital to help the wound heal and it was painful. Thinking of that right now makes me realise how much healing has taken place. I couldn't walk straight and lifting my leg to take each step was painful and heavy.
After leaving the hospital, I spent my days nursing my baby. I didn't go out much. I only did it when I went for my checkups, baby's vaccination and when I was travelling. That is a lot of staying at home. If I didn't have any of these things to do then I would just stay at home. So I wasn't going for walks outside. I did all of my walking inside the house or within the compound, lol. And to me, it felt enough since I had to do a lot of up and down movements in order to feed and make the baby sleep.
But it wasn't. I felt the proof that day I walked for my research. It got me thinking about taking regular walks outside the house so that my lower abdomen could feel at ease. I didn't start immediately I got the thought though. It took me a month after this incident to start. And that was when my baby turned six months.
I have always been reluctant to do any physical exercise for fear of causing problems to the wound but at this point, my body felt ready to begin working out.

I started walking for the first two days. Then I decided to try jogging a little after walking. And that's how I started jogging. On some days when I don't feel like I have enough strength, I just walk or I don't jog at all. I listen to my body and mind a lot in the process. The goal is to push myself to do more but when my body or mind is not really up to it I leave it for another day.
The good thing is that I am motivated on most days to go jogging. But when I'm not motivated, I push myself to still do it. But I won't force myself to jog on a day that my body can't take it. On some days I'm just tired and need more rest or probably sleep instead of jogging.
The fun thing is that I jog only around the house. It doesn't take more than fifteen minutes. Some days I only do five minutes. I jog in my normal clothes and I always thought it was impossible to run or jog in flat shoes or canvas but the ones I use are pretty good. At this point, I've realised that there is no excuse to not start something as long as you can start with what you have.

I'm really glad I started jogging and I hope to spread the positive energy and motivation it gives me for my other goals.
If you are thinking of starting a physical activity or workout after a CS my advice will be to start small and listen to how your body responds before you go to the next level. Our bodies are different and so is our healing. So go gently.
If you also had a baby by CS, please share your experience with healing in the comment section.
How To Cook Nutritious Pap for Your Baby At Home
If you've been following up on the blog lately, I've been posting about how to make baby food which is commonly known as pap in my country Cameroon. I know there are mums reading my blog from various parts of the world and I thank you so much for reading my blog.


In Cameroon, pap is a meal generally made from corn. It is commonly made from soaked corn but there is also the dry version of it which is usually composed by adding other ingredients to make it richer. This composition is done especially for babies to introduce them to solid food and to make them grow well.
I introduced my baby to pap at the age of four and a half months. I was hesitant at first but since I had plans to wean her at six months, I decided to start making her used to eating other food. Though she is already six months old, I'm still breastfeeding her (wink) and pap is also an important meal for her.
I explained how I compose my baby's pap and what my baby eats in a day in these posts:
After composing the baby's pap, cooking it properly is the next step (obviously). And that's exactly what we are going to do now.
How To Cook Your Baby's Composed Pap

- Sieve the quantity of pap you want to cook. You may also sieve all the quantity you ground and store so that you don't have to sieve it each time you want to cook it.


- Add some water to the sieved powder and let it soak for about fifteen to twenty minutes. Allowing it to soak makes it get ready faster. But you can also cook the pap without soaking it first. I found out that it gets ready faster after being soaked for a few minutes. Whatever the case you have to mix the powder in some water before you cook it.


- When it's time to cook, I heat up the pot to sterilize it. Put some clean water to it.

- Add the soaked pap to the water in the pot and stir. You have to be careful here because if you cover the pot, in a few seconds it will rise and flow out of the pot when it boils. So either leave it half open (but it will take longer to get ready) while cooking or cover the pot but open it to stir it every few seconds.

- Keep stirring and adding water when necessary while it cooks.
- Cook till the raw smell is gone (lol, yeah. That's how I know it's ready).
- Also, watch the thickness. In the beginning, it is better to make it a little watery since the baby is just starting with solids. The digestive system needs to get used to receiving solids before you can make it thicker. I remember making it thick the first time and my baby's stool was almost hard. So avoid making it thick in the beginning. But as time goes on, you can add the thickness so that the baby eats more. As the thickness increases, make sure to give add fruits to the diet of your baby so that they don't have problems stooling.
- Serve it plain or add some baby's milk to it before feeding your baby. I add a few scoops of her milk to it because she denied other forms of milk. So I simply add it to her pap.
That's how to prepare your baby's composed pap. Hope you found this post useful. Please share with other moms and let them get informed too.
Why I Love Personal Blogs
Don't get me wrong, I love a variety of blogs. But the ones that I love the most are personal blogs. If you are wondering what a personal blog is: it is a blog where the blogger shares their life and things happening around them. it is usually filled with emotion and personal opinions about the topics discussed.
When I started blogging, I read a number of personal blogs and felt motivated to start mine. I visited and navigated lots of blogs. But the ones that I really enjoyed reading were the ones with personal stories.
Reasons Why I Love Personal Blogs

I enjoy reading about the lives of others
Personal blogs are a window into other people's lives. It allows you to see and understand how others live and experience life. And I find this amazing. Personal pictures and thoughts grant an understanding of someone else's culture just like you are living with them.
They make you feel less lonely
On personal blogs, people share their journeys and the things they deal with daily. These stories are shared to give a sigh of relief to others going through the same thing and make them feel less lonely in their situation. I love to have the me-too or the glad-I'm-not-the-only-one feeling when I read a personal blog.
I believe personal blogs are good for learning life lessons
There are lots of life lessons to be learned from personal blogs. The stories of others inspire, educate and inform you. Everyone is going through something and sharing those experiences helps those in that same situation to learn from you
They are entertaining and comforting
Some personal blogs have a very soft and comforting tone while others have a remarkable sense of humour which makes the blog interesting and entertaining.
I don't know if you were expecting a list of personal blogs that I read but I'm sorry that I can't share one because I haven't made a list. if you are a blogger reading this please comment below and leave a link to your blog so I can check it out. And if you are a lover of personal blogs, which blogs are you following?
Personal blogs are written with a lot of love and emotion. I hope you read more personal blogs and interact with them.
I Tried the Turmeric & Honey Face Mask for Almost Two Weeks!
A few months into my pregnancy I couldn't control the changes my body and face went through. My skin changed completely and I discovered that all the products or things I tried were to no avail. So my only beauty product at the time was olive oil. I hated any fine smell while pregnant so olive oil was the only thing I used until I put to bed and even a few months after (about four months after).
This post is not about how olive oil saved my beauty life during pregnancy. It is about how I am bouncing back to taking care of my skin again after having a baby. This came about when my face recently broke out uncontrollably.

The thing is while I was pregnant, I suffered from acne during the first months only and by the fifth month, my face was glowing while other parts of my body were just trying their best. This went on till after I gave birth and last month my face was filled with acne again.
I hope I'm not rambling here but long story short, I decided to take my beauty into my own hands and start caring for my precious skin.
That's why I decided to try the turmeric and honey mask.
Tumeric became such a trend at one point in the history of beauty that I wanted to trend with it as well. But I didn't have access to it. Every blogger was talking about or recommending turmeric. And here we are now trending after the trend with no worries.
Turmeric and Honey face mask - How did it work for me?
Day 1
Here is my face before I used the turmeric. This is the first time I used turmeric on my face. I have eaten turmeric but never used it on my face until now.

The first day I applied it, I let it stay on for a little more than an hour. My aim was to let it on my face for as long as possible so that I can get better results. I believe that the longer honey is left on the skin, the more it works.


Honestly, I didn't expect the turmeric to be grainy. I thought the powder was very smooth. So after mixing the honey and the turmeric powder, I applied it to my freshly washed face. My face was even still wet when I was applying it. But let it not be too wet as it may make the mixture watery and dripping from your face.

So while applying the mixture, I rubbed it in a circular motion. This helps to exfoliate as the grains rub the skin. After applying it, I started making faces for the camera - lol.


The change I realized after using it on day one was that my face was softer, brighter and smoother. This encouraged me to look forward to applying it again in the days to come and to be consistent with it.

I was chased and almost stung by a bee. While I did some work outside, a bee followed me because of the smell of the honey. I ran away each time in fear. The bee found a way right into the room where I was and I ran out. I started making sure that I had nothing to do outside when I applied my mask in order to avoid another encounter with the bee. This bee didn't even make the honey I use but it wouldn't let me put my mask in peace oh.
Day 2 - 5

I was chased and almost stung by a bee. While I did some work outside, a bee followed me because of the smell of the honey. I ran away each time in fear. The bee found a way right into the room where I was and I ran out. I started making sure that I had nothing to do outside when I applied my mask in order to avoid another encounter with the bee. This bee didn't even make the honey I use but it wouldn't let me put my mask in peace oh.
Day 6 - 9
My face became clearer, smooth and dark spots were less dark but I had the strongest desire to stop doing it because it started feeling like a lot of work. But I kept on and wanted to push myself to do it for two weeks as planned.
On day eight and nine, I added some water to the mixture and kept it for some time before applying to my face. The turmeric was softer and less aggressive to my skin when I rubbed it. I recommend this method when you don't want to scrub your face. Adding water is also good because it enables the components of the mask to deeply penetrate your skin.
Why I didn't do it for two weeks
This face treatment was meant to be done for two weeks but I couldn't go all the way. I was quite busy most of the time and the best times I could apply this mask was when I was doing laundry. But since the bee won't let me do my thing in peace I had to find time specifically for applying this mask which made it feel like a chore. It's easier to do this while doing something else than to do just this alone. I hope you understand what I mean. I had to apply the mask and stay indoors till I get to wash it off. It was hard to deal with that.
Stopping it was not planned though. I realized that I had skipped one day, then another and then another before I made up my mind. I would have loved to do a full two weeks but I couldn't.
My overall thoughts of the mask
It's a good mask! I know you may be thinking 'why stop it if you recommend it?'. But this mask is good because:
- It's natural and there are no side effects
- Honey and turmeric are very good for the skin so mixing them up to apply on the skin is doing your skin a lot of good.
- It softens your skin, brightens your skin and fades dark spots.
- It can also be used to exfoliate your skin to get rid of dead skin cells.
- It's affordable and the ingredients are easy to find.
Will I use this mask again?
Definitely yes! I will use it again. Maybe this time once a week. I used it continuously for over a week because I had issues to clear off my face. So now, once a week will do for me.
if you want to try this face beauty mask, please do. But stay indoors if you live where there are flowers because flowers attract bees and bees will question you for using their honey. lol.
With pleasure, I'm glad you read this post and hope you share with your friends. I'll see you in my next one as always.
Ngumabi.
How To Compose Nutritious Low-Cost Pap (Baby Food) At Home
When it's time for your baby to transition to eating food other than breastmilk, it can make you worry about a lot of things. Amongst these worries are:
- what will I feed my baby?
- what will I feed my baby?
- when do I start adding other foods to my baby's diet?
- how much will it cost me?
- do I buy baby food or make it at home?
- how do I make sure that these new foods are clean and healthy for my baby to consume, etc?
With these doubts in mind, we have to make a decision. Most times, parents are looking for the cheapest way to feed their children. Because that's something they will be doing for a very long time. And also, parents want their baby's food to be very nutritive and healthy.
Today, I'm sharing with you my low-cost method of making baby food. It is very nutritive and will make your baby transition from breastmilk to solid food well.
How To Make Nutritious Low-Cost Pap (Baby Food) At Home

Ingredients
To compose this baby pap, you will need:
- Corn
- Groundnut
- Dry Fish
- Soybeans
- Rice
Measurements
The measurements should be proportionate to each other. Pap is usually made with corn so other ingredients are added to enrich it or make it more nutritious. So the corn can be a bit more than the other ingredients.
Value
The groundnuts and soybeans are for plant protein and the dry fish are for animal protein. You can omit the dry fish if your family is vegetarian. Rice and corn are carbohydrates and rice helps to make the pap thicker and smoother.


Preparation
All the ingredients have to be quite dry and clean. Select the grains to remove the bad grains from the good ones. Take off the scales, skin and bones from the fish.
You may fry the soybeans a little before grinding.
To make sure the grains are clean, wash them after selecting then dry them again. I dry mine in the sun.


Mix them and grind all together then they are quite dry.
NB: In Cameroon, we go mostly to grinding mills to grind a lot of things. If you are in Cameroon, make sure that you find out if your grinding mill will accept grinding the whole mixture or if they will prefer to grind it separately. In towns like Yaoundé, most grinding mills will grind all the grains, and fish mixed together but in Bamenda, most grinding mills will prefer to grind them separately before you mix them together.
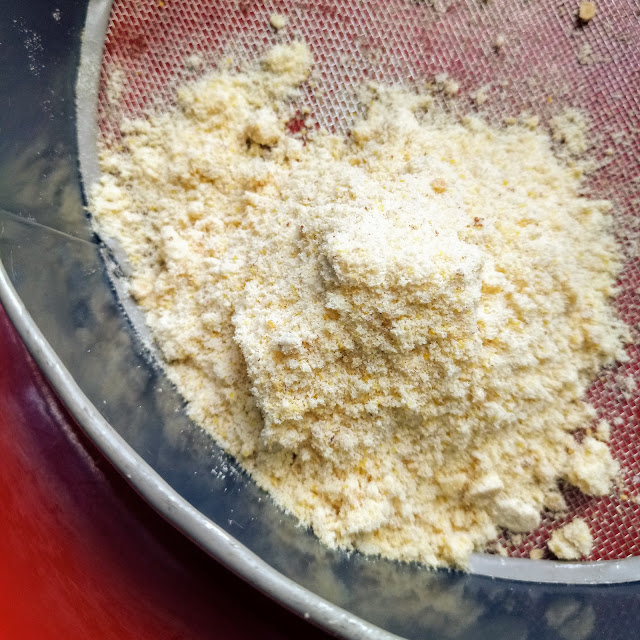
This is what you get after grinding and mixing all together. This one was ground separately and then I mixed it. But sometimes when I find a place where they can grind this all at once I am so happy because it just grinds everything all together.
After grinding, you can sieve it all at once so that you will not have to sieve it every time you want to cook it.
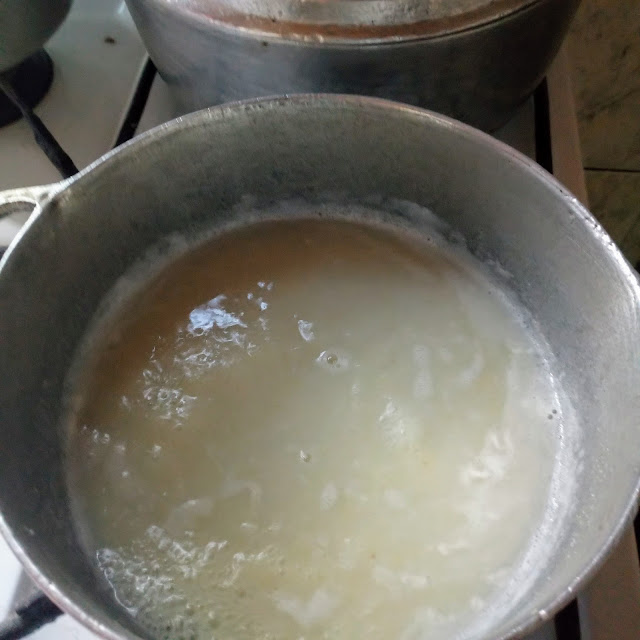
This is how it looks like when it's cooked.

I'll show you step-by-step how I cook this baby food in the post below.
Related: How to cook composed baby pap
What My Six-Month-Old Eats (And Drinks) In A Day!
My daughter just turned six months old. I can't thank God enough for this joy he let me experience. It's been sweet six months of bonding and getting to know each other. Though there have been ups and downs, I don't regret any minute being a mother.
Half a year is such a big deal in the life of a baby so today, I'm sharing with you what my six-month-old eats in a day.

Normally I planned to wean her at six months, but a month ago I decided to breastfeed her for some more time. I guess I'm enjoying our mother-daughter time during breastfeeding and I just feel it's not yet time to wean her as well. I didn't imagine that I would enjoy breastfeeding - like it hurt so bad during the first month that I kept saying to myself that I can't wait to wean her. But now it's an enjoyable moment for both of us though it can be such a struggle when she is distracted, lol.

Another thing that my six-month-old-daughter eats is banana or pawpaw fruit. Each day she eats one of these two fruits though most of the times its banana. I scrap it gently with a spoon and mash it for the texture to be smooth before she eats. At first, I mixed it with orange juice but later realised it was better that she eats both separately. Which brings me to my next food which is...
I simply squeeze the orange and she drinks it right after eating the mashed banana. I personally don't think she should be drinking orange juice on an empty stomach so I give it to her right after the banana.

If you don't know what pap is; it is a meal made from corn which is ground wet or dry and cooked to give a smooth paste. For children or babies, it is enriched with other foods that are rich in nutrients. You can compose your baby's pap by yourself and I will soon be sharing my recipe on the blog. So my baby eats pap at least once a day.
Water is an important part of her diet. She drinks water regularly and throughout the day.
That's what my six-month-old eats in a day. As you noticed it's all homemade. That's because it's cheaper and also more trusted food. I may consider other baby food but that's it for now. I just thought I should share with you guys who are curious and also other moms who want to know what other moms feed their six-month-olds.
Half a year is such a big deal in the life of a baby so today, I'm sharing with you what my six-month-old eats in a day.

This Is What My Six-Month-Old Eats (And Drinks) In A Day!
Breastmilk
Normally I planned to wean her at six months, but a month ago I decided to breastfeed her for some more time. I guess I'm enjoying our mother-daughter time during breastfeeding and I just feel it's not yet time to wean her as well. I didn't imagine that I would enjoy breastfeeding - like it hurt so bad during the first month that I kept saying to myself that I can't wait to wean her. But now it's an enjoyable moment for both of us though it can be such a struggle when she is distracted, lol.
Mashed Banana / Pawpaw

Another thing that my six-month-old-daughter eats is banana or pawpaw fruit. Each day she eats one of these two fruits though most of the times its banana. I scrap it gently with a spoon and mash it for the texture to be smooth before she eats. At first, I mixed it with orange juice but later realised it was better that she eats both separately. Which brings me to my next food which is...
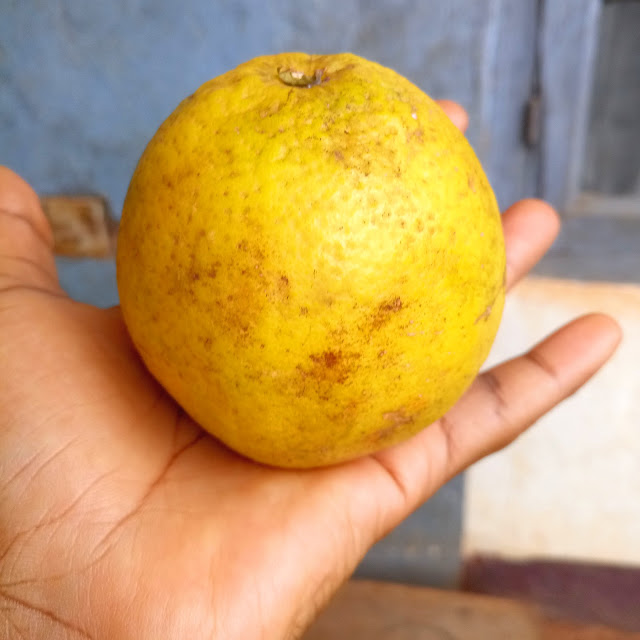
Orange Juice

I simply squeeze the orange and she drinks it right after eating the mashed banana. I personally don't think she should be drinking orange juice on an empty stomach so I give it to her right after the banana.
Pap

If you don't know what pap is; it is a meal made from corn which is ground wet or dry and cooked to give a smooth paste. For children or babies, it is enriched with other foods that are rich in nutrients. You can compose your baby's pap by yourself and I will soon be sharing my recipe on the blog. So my baby eats pap at least once a day.
Water
Water is an important part of her diet. She drinks water regularly and throughout the day.
That's what my six-month-old eats in a day. As you noticed it's all homemade. That's because it's cheaper and also more trusted food. I may consider other baby food but that's it for now. I just thought I should share with you guys who are curious and also other moms who want to know what other moms feed their six-month-olds.
Easy Way To Bake A Fluffy Banana Cake All By Yourself - Cameroonian Recipe
Banana Cake is one of my favourite cakes because believe me or not, my grandma bakes the most delicious and fluffy banana cake ever!
Today, she decided to bake one and I want to share her recipe with you guys. No long intro today. Let's start baking!


Bananas
Flour
Eggs


Groundnut oil
Sugar
Salt
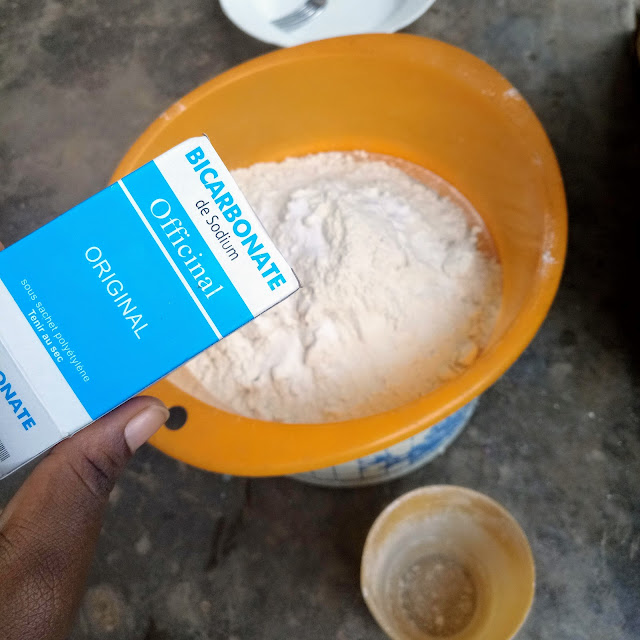
Bicarbonate
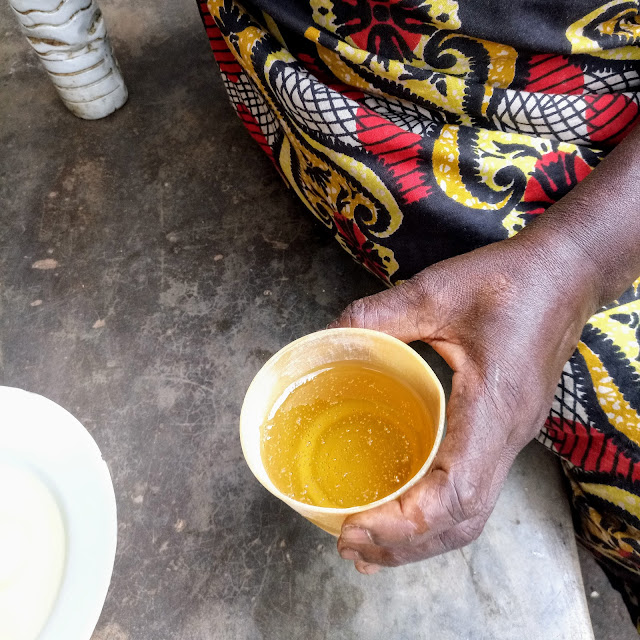
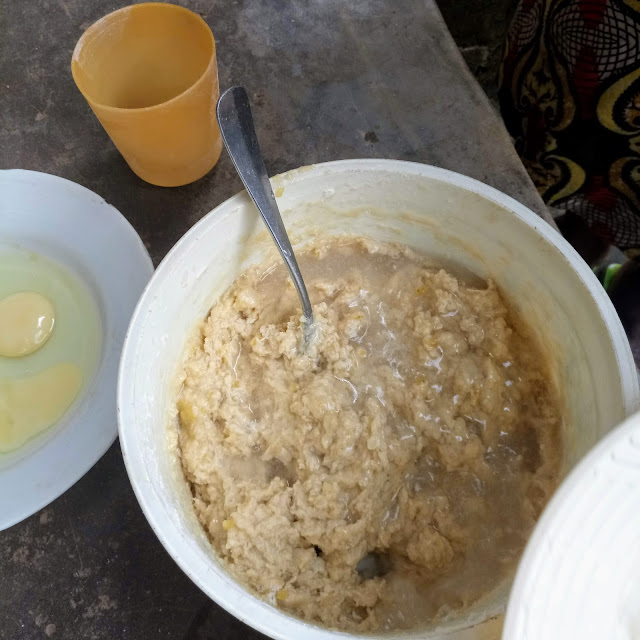
Most of our cooking in Cameroon is based on estimations. We hardly measure. But for this cake, we used the brown cup you see in the pictures to measure the flour and groundnut oil. One of this cup is equal to one and a half glasses.
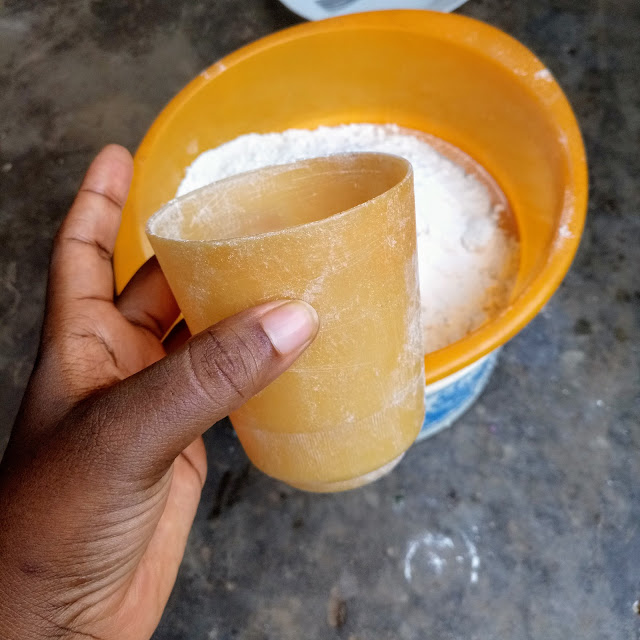
For the flour, we used two of brown cups which is equal to three glasses of flour. The groundnut oil was almost a cup full which is equal to one and a quarter glasses of groundnut oil.
We used two eggs, four medium-sized bananas and ten cubes of sugar melted in half a cup of water.
The bicarbonate used was one eating spoon and the salt was less than a quarter eating spoon.
I hope the measurements make sense, lol. Let's bake it!
Put a pot on the fire (we used a wood fire) and put three stones in the pot. Cover it and allow it to heat up while you mix the cake.

Sieve the flour, bicarbonate and salt in a bowl.


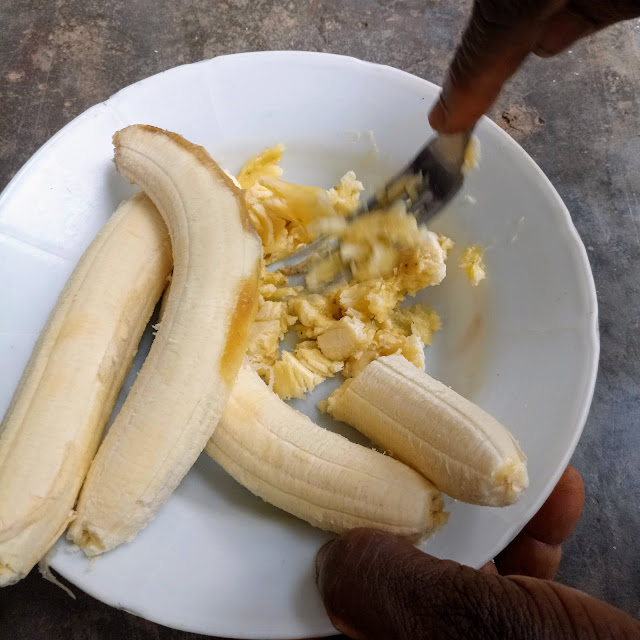
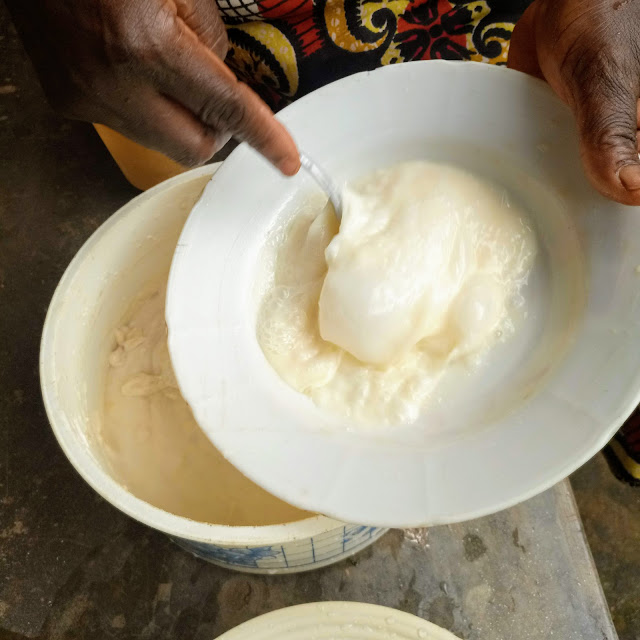
Peel and mash the bananas.


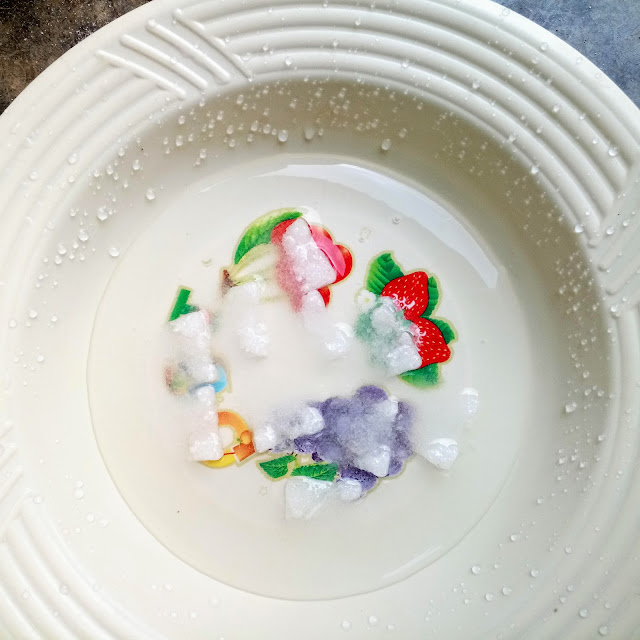
Put sugar in some water to melt.
Add the mashed bananas to the flour. Add groundnut oil and sugar solution. Mix well.


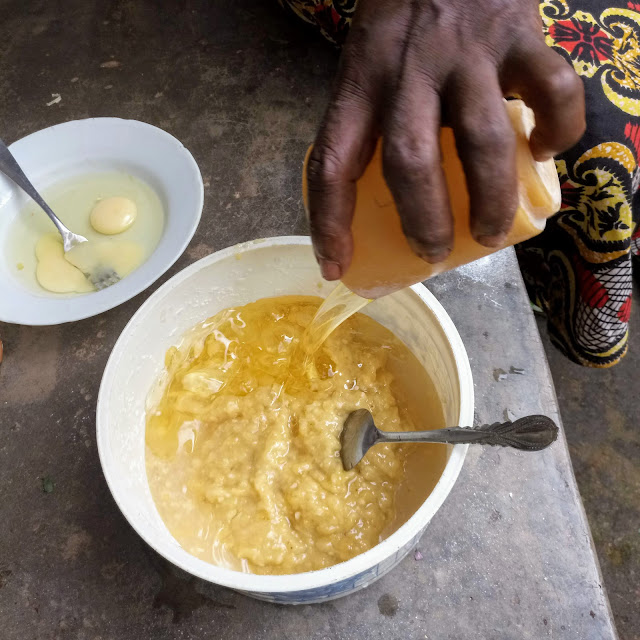
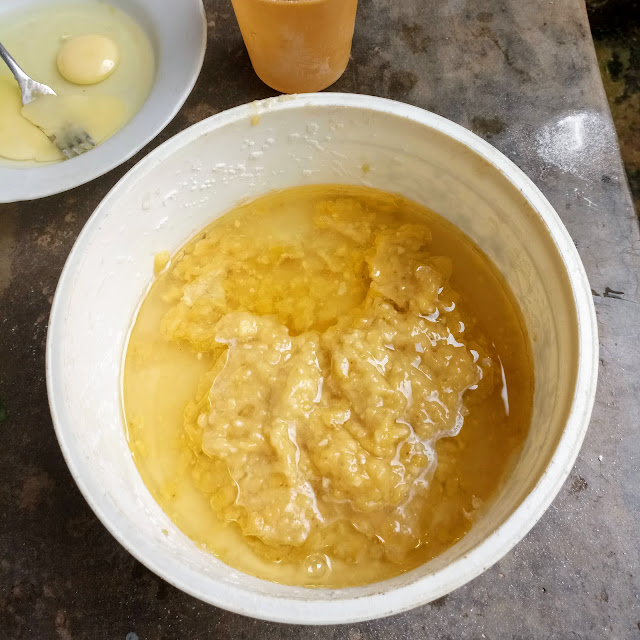
If the mixture is still too thick, add a little water and mix.
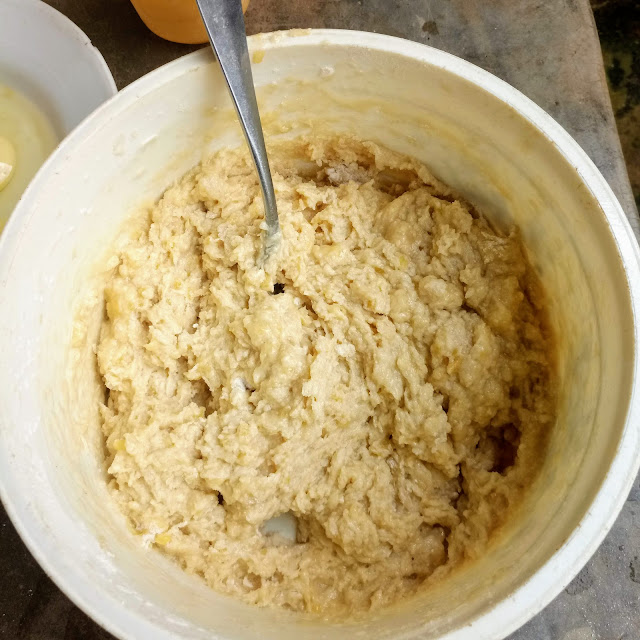

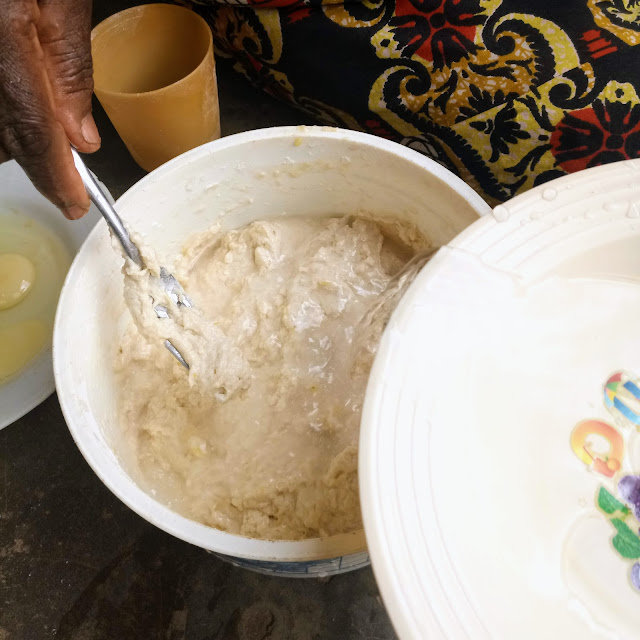
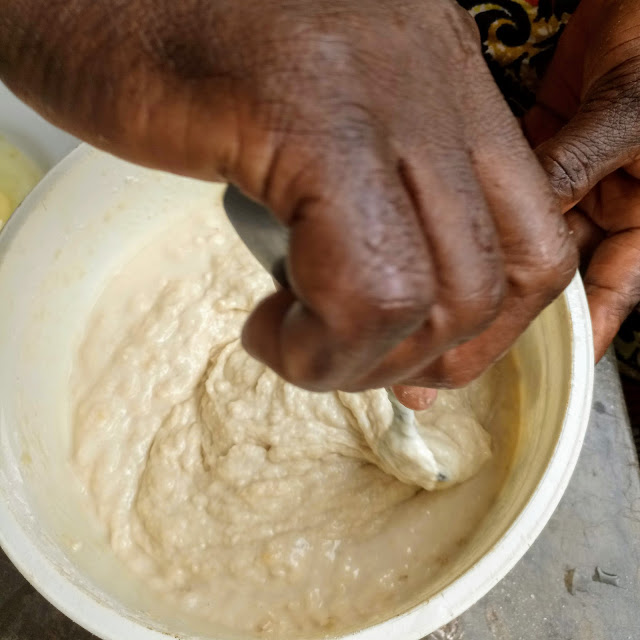
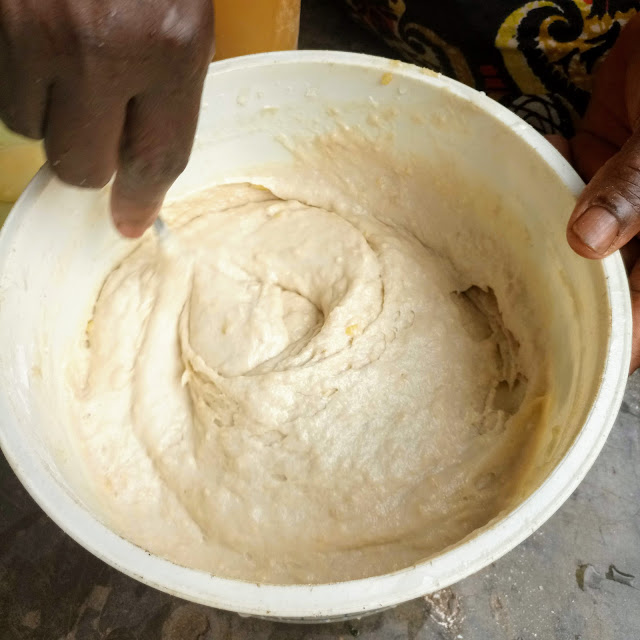
Break and beat the eggs then add to the mixture. Mix well till smooth.


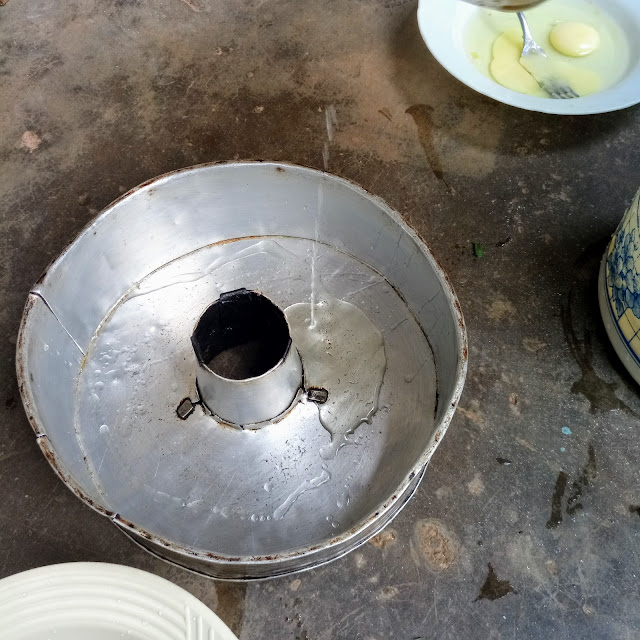
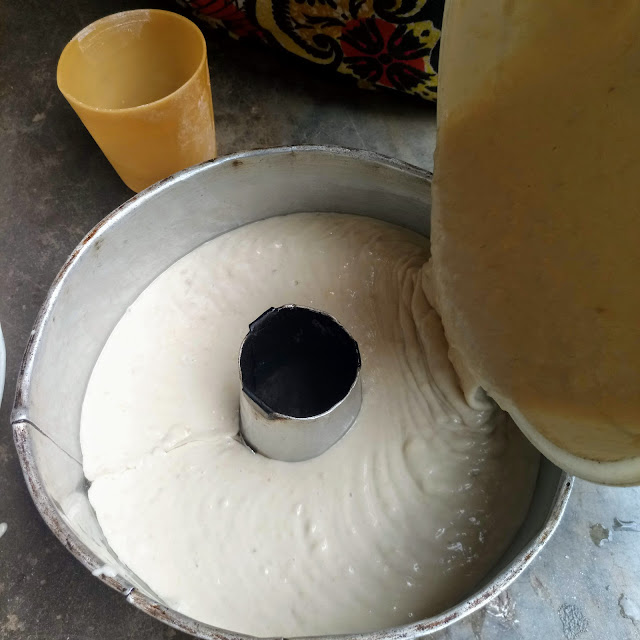
Rub some oil in the baking pan and pour in the mixture.


Put the baking pan on the stones in the pot and cover it. Make sure that you use a pot with a lid that covers well. Constantly make the fire under the pot to burn well.

Bake for at least 45 minutes before opening the pot to check if it's ready.
When ready, allow it to cool then slice and serve.

Today, she decided to bake one and I want to share her recipe with you guys. No long intro today. Let's start baking!

How To Bake A Very Fluffy Banana Cake By Yourself
Ingredients

Bananas
Flour
Eggs


Groundnut oil
Sugar
Salt
Bicarbonate

Measurements
Most of our cooking in Cameroon is based on estimations. We hardly measure. But for this cake, we used the brown cup you see in the pictures to measure the flour and groundnut oil. One of this cup is equal to one and a half glasses.

For the flour, we used two of brown cups which is equal to three glasses of flour. The groundnut oil was almost a cup full which is equal to one and a quarter glasses of groundnut oil.
We used two eggs, four medium-sized bananas and ten cubes of sugar melted in half a cup of water.
The bicarbonate used was one eating spoon and the salt was less than a quarter eating spoon.
I hope the measurements make sense, lol. Let's bake it!
Preparation
Put a pot on the fire (we used a wood fire) and put three stones in the pot. Cover it and allow it to heat up while you mix the cake.

Sieve the flour, bicarbonate and salt in a bowl.


Peel and mash the bananas.


Put sugar in some water to melt.

Add the mashed bananas to the flour. Add groundnut oil and sugar solution. Mix well.


If the mixture is still too thick, add a little water and mix.


Break and beat the eggs then add to the mixture. Mix well till smooth.


Rub some oil in the baking pan and pour in the mixture.


Put the baking pan on the stones in the pot and cover it. Make sure that you use a pot with a lid that covers well. Constantly make the fire under the pot to burn well.

Bake for at least 45 minutes before opening the pot to check if it's ready.
When ready, allow it to cool then slice and serve.

Subscribe to:
Posts
(
Atom
)


